Stable Diffusion control nets are a great way of putting flesh on the bones at design concept stage, creating rapid iterations and introducing features and finishes that can be built upon. Let me show you how.
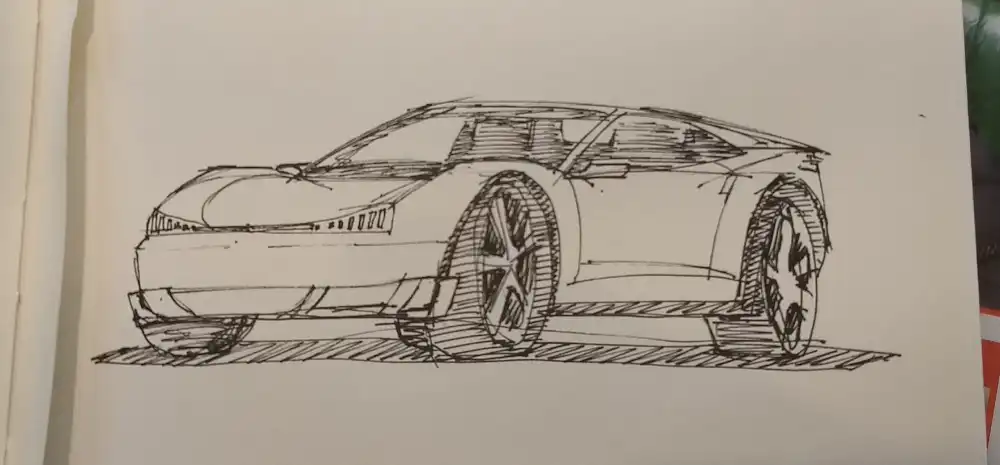
Here, I’ve made a sketch in my sketchbook, using a fine liner. This is just an imaginary off-road type sports car. It’s a little bit Ford New Edge. Maybe we can pretend it’s a Capri successor from an alternate 1998 that envisioned the current off-road sports car boom twenty years early.
Traditionally, the only way to see this in any kind of rendered form would be to manually paint in some surfaces and reflections using software such as Photoshop, as follows:

Not only is this rather manual, it doesn’t look great (mainly because I’m not very skilled at Photoshop painting like this).
As an alternative, let’s see what we can do with Stable Diffusion.
A constrol net is a way of constraining the generation process. They come in various varieties, and can be used with both the popular Automatic1111 and ComfyUI Stable Diffusion user interfaces. They are used in image-to-image workflows, which is to say when you take a source image – such as our sketch above – and use that to create the output, rather than typing in a prompt as text.
Popular control nets include canny, which picks up on edges in the source image, depth, which creates a “depth map” based on the source image, estimating which parts of what it shows are nearest the viewpoint and which are furthest, and soft edge, which is similar to canny, but blurrier, leading to fewer edges appearing in outputs where there aren’t edges in the input.
An advantage of Stable Diffusion is that you can output grids of images, varying different generation parameters simultaneously in order to see the difference changes actually make.
For instance…
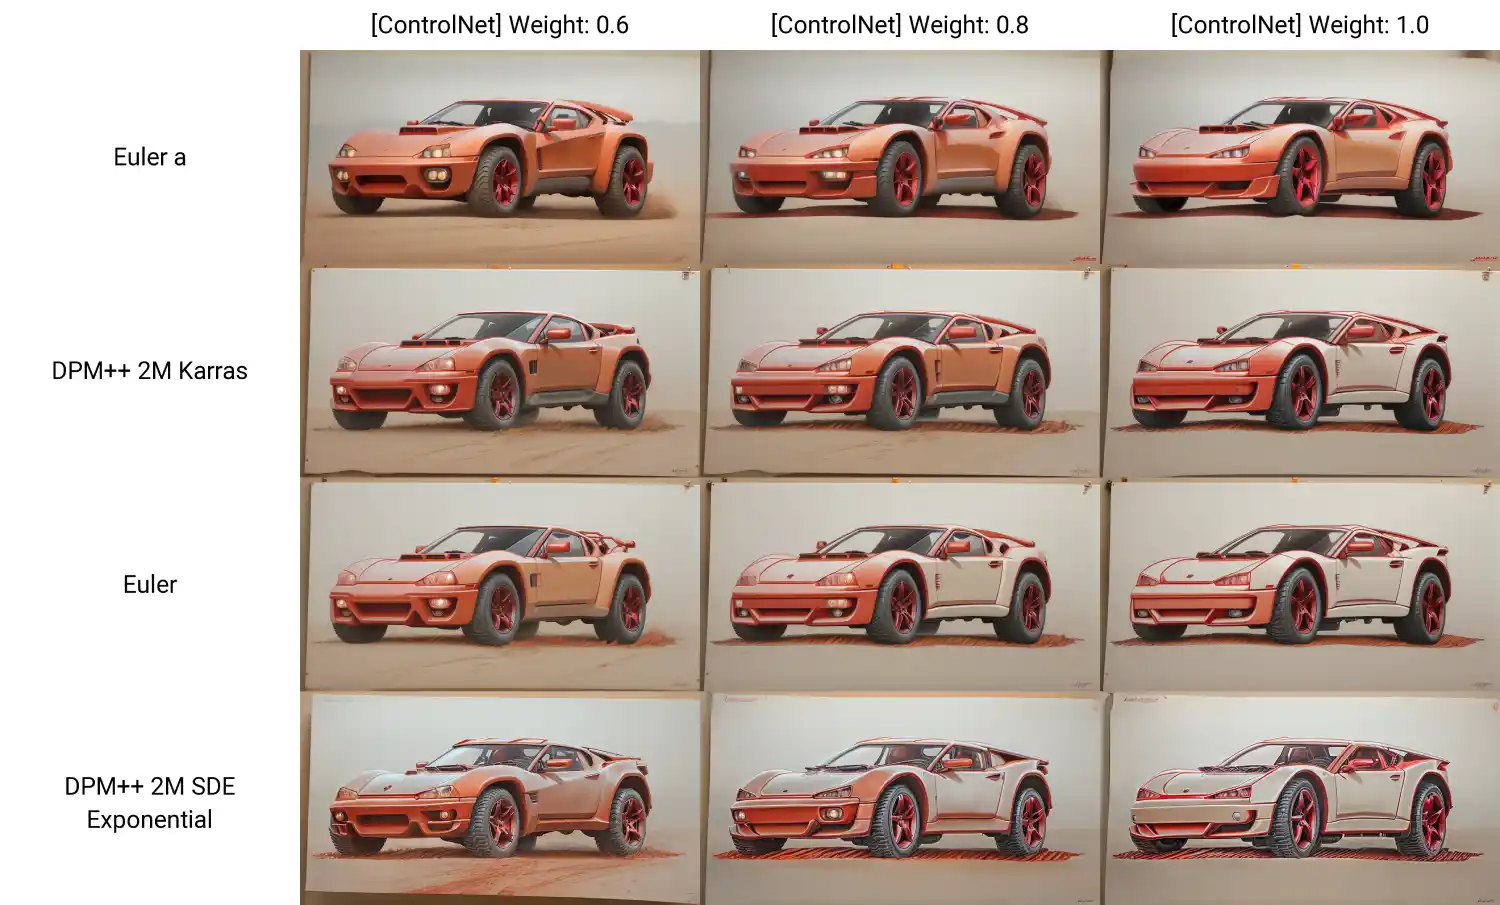
Here is a grid of images generated in A1111 using the sketch above. There was an additional text prompt added – “off-road sports car” – but no negative prompting. A single control net was used, the soft edge.
The first paramaters being changed here is the sampler, which controls the denoising of the noise initially generated. If you want a great overview about Stable Diffusion’s samplers, click here: https://stable-diffusion-art.com/samplers/
The second parameter being changed is the ControlNet weight. This is the strength that is assigned to the effect of the control net on the generation. You can see that the strongest setting, on the right, produces images that look most like the sketch. This, however, also extends to making the image literally look more like the white paper it’s drawn on too. You’ll notice, though, that this is different for each, with the “Euler a” sampler producing a result that appears almost fully rendered.
Where the ControlNet weight is lower, on the left, the model uses more of the inferences learned from its training data to create images based on the prompt – “off-road sports car”.
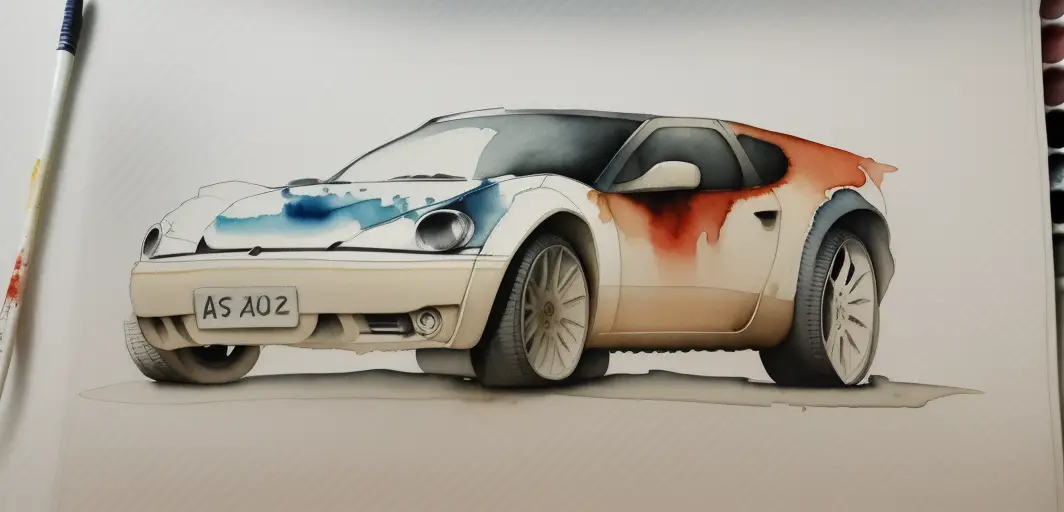
This image uses the skribble-sketch control net, which is designed to use hard drawn sketches as its starting point. This was in combination with the euler a sampler. Note that a paintbrush has appeared on the left of the image, presumably because the image appears to feature paint or ink. This could be controlled with tighter constraining.
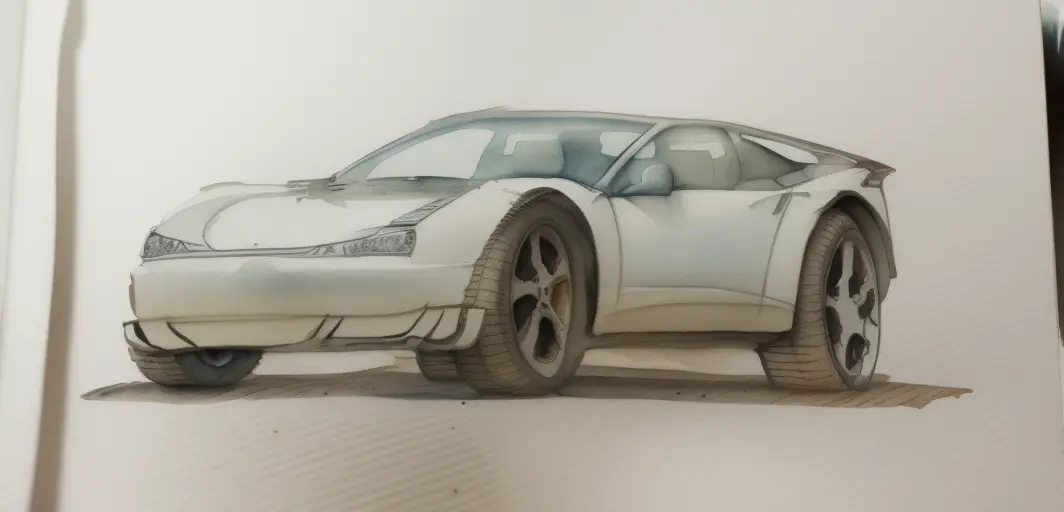
This one is using the same sampler, euler a, but the soft edge control net instead.
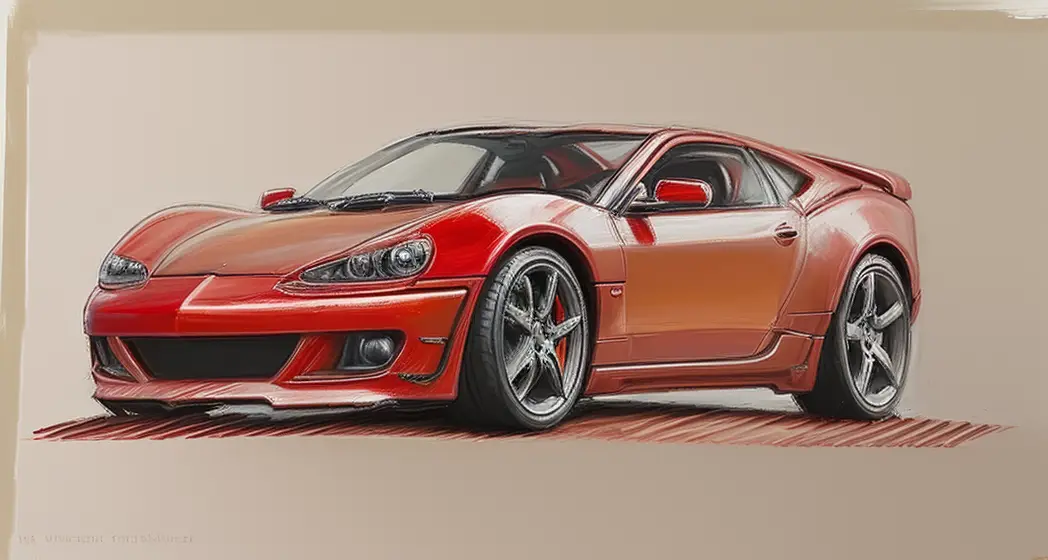
This one sticks with the soft edge control net, but makes use of the Karras sampler.
There are many other settings that affect how the end result comes out, and these control nets can be combined together in various ways. However, for a quick overview of some of the basic, hopefully this serves to illustrate!
